Showing posts with label Filipino food. Show all posts

Poppy Seed Chicken

Tuesday, October 26, 2010

The first time I ever had Poppy Seed Chicken, if I am not mistaken, was at Stacy's (my fiance) family reunion a few years back. I didn't even know what it was; all I know is that it was good! I always look forward to going to the family reunions, especially for that dish! Here recently I went to a "meat and three" in Wetumpka which is a small town a few minutes from my home. I ordered Poppy Seed Chicken for my daughter not even knowing what in the world I was ordering. When the dish came to my table and I tasted it for Autumn to see if she would like it, I immediately ordered some for myself. Point of the story? I love Poppy Seed Chicken. It has so much flavor and my family loves it.

The first time I made this dish I looked online for a bunch of different recipes, like I always do, and tried to make my own but they're almost all the same. I don't like being the same as everyone else, in case you didn't know, so I tried to come up with a different recipe. The first time was awesome, the second time was better, and the third time was almost perfect!

Here's what I did:

I used the basic recipe with a couple of little twists.

INGREDIENTS:

4 boneless skinless chicken breasts

2 cans cream of chicken soup

10 oz sour cream

1 cup shredded cheddar cheese

1/2 tsp garlic

2- 3 tbsp poppy seeds

3/4 cup melted butter

1 1/2 sleeves Ritz crackers

salt and pepper for taste


PREPARATION:

I first started preheating my oven to 350 degrees and then by cutting my chicken into one inch cubes. Once all the chicken was cut up, I threw it into boiling water and let it cook for about 20 minutes. on med-low heat.  


While my chicken was boiling  I made the sauce that would go over the chicken. I mixed the cream of soups, sour cream, cheese, garlic, salt, pepper, and about a tablespoon of poppy seeds into a small mixing bowl.


Once the chicken was done, I shredded it with my fingers and spread it out into a greased casserole dish. While some people like to keep their chicken cubed, I prefer to cube and then shred mine because I like the chicken in every bite I take once it's on my plate. I learned this time around that cubing the chicken made it easier for me to shred the chicken with my fingers and was less time consuming because the pieces were much smaller to shred!


My next step is to merely spread the soup mixture on top of the shredded chicken.
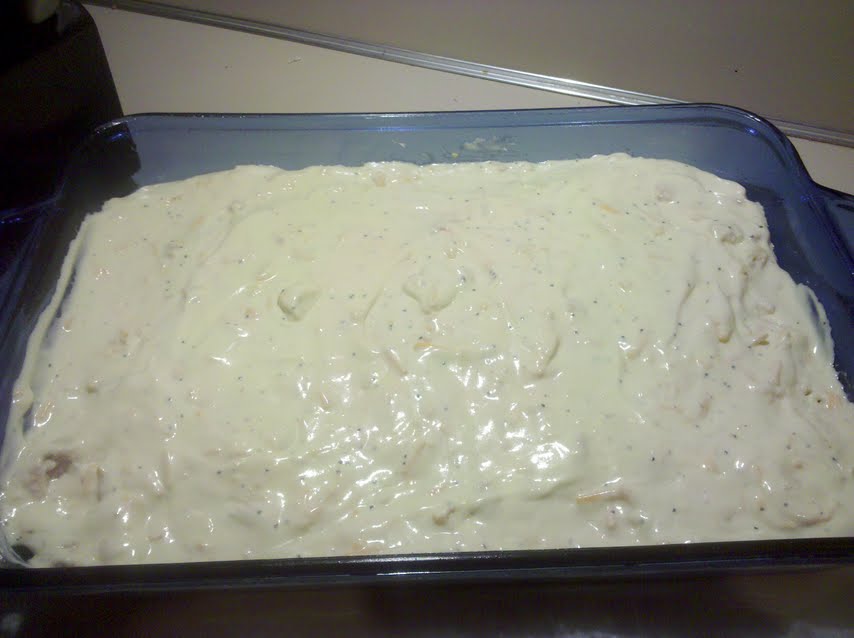


After all of the soup mixture was spread evenly, I crumbled up a sleeve and a half of Ritz crackers and evenly distributed them over the soup mixture. Once the crackers were evenly spread, I poured my melted butter slowly and evenly  over the crackers making sure to have butter on almost every piece of cracker. 


Lastly, I sprinkled about two tablespoons of poppy seeds on top of the Ritz crackers. I then stuck my dish into my preheated oven for 30 minutes.


Here is my final product. I typically serve my chicken on top of white rice and eat it like that, but this plate was for one of the children who came over to eat so I had to separate it.


This recipe is sure to be a crowd-pleaser! I ended up being able to serve four adults and four children with this dish and still have about two servings left over. It's so good and has become a regular entree in our household. I try not to make it very often because, like every dish, if you eat it too much you're going to get tired of it and no one in my family wants to get tired of this. It's that good! :)

Steak and Shrimp Kabobs & Stuffed Mushrooms

Friday, October 22, 2010

The other night was the last night one of my very best friends, Cindi, had in Montgomery before going off to BFE (just kidding) for two months so I wanted to make her dinner. The original plan was to cook rice, kabobs, squash, and stuffed mushrooms, but I got bored with it so I made Christina's Stuffed Mushrooms, and my own special kabobs.

I must first start by telling you about Christina and how friggin fabulous she is! You can find her website at http://www.dinneratchristinas.com/. Almost all of her recipes are original and are to die for! Every time I have ever made her stuffed mushroom recipe, I giggle to myself because they're one of the most wonderful appetizers I've ever put into my mouth and she hates mushrooms. I don't know how she came up with this recipe, but you have to try them. Man, they're good! It's not only this recipe that I've absolutely loved, but also her Mexican Shredded Pork, too! Anyway, enough about Christina; she's gonna steal all the fame one day! ;)

As for the kabobs-- These things were sooo damn time consuming, but were well worth the wait!

Marinade:

I'm gonna go ahead and tell you guys. I'm not one to measure the ingredients I put into my recipes. On all of my past posts, the've been approximate, so bare with me and use your imaginations if you're going to copy these recipes to a T!

You'll need:

Soy sauce

Worchestershire sauce

Garlic powder

Onion powder

Thyme

1-2 limes


I can tell you that I used half of the worchestershire compared to that of the soy sauce. In other words, don't use much worchestershire. :)

Once I made the marinade, I threw my meats and vegetables into it.

Ingredients for kabobs:
One BA sirloin steak (I think mine was like 1 1/2 to 2 lbs)

3/4 pound of shrimp

2 zucchini

1 extra large purple onion

2 packs of fresh mushrooms

2 large bell peppers


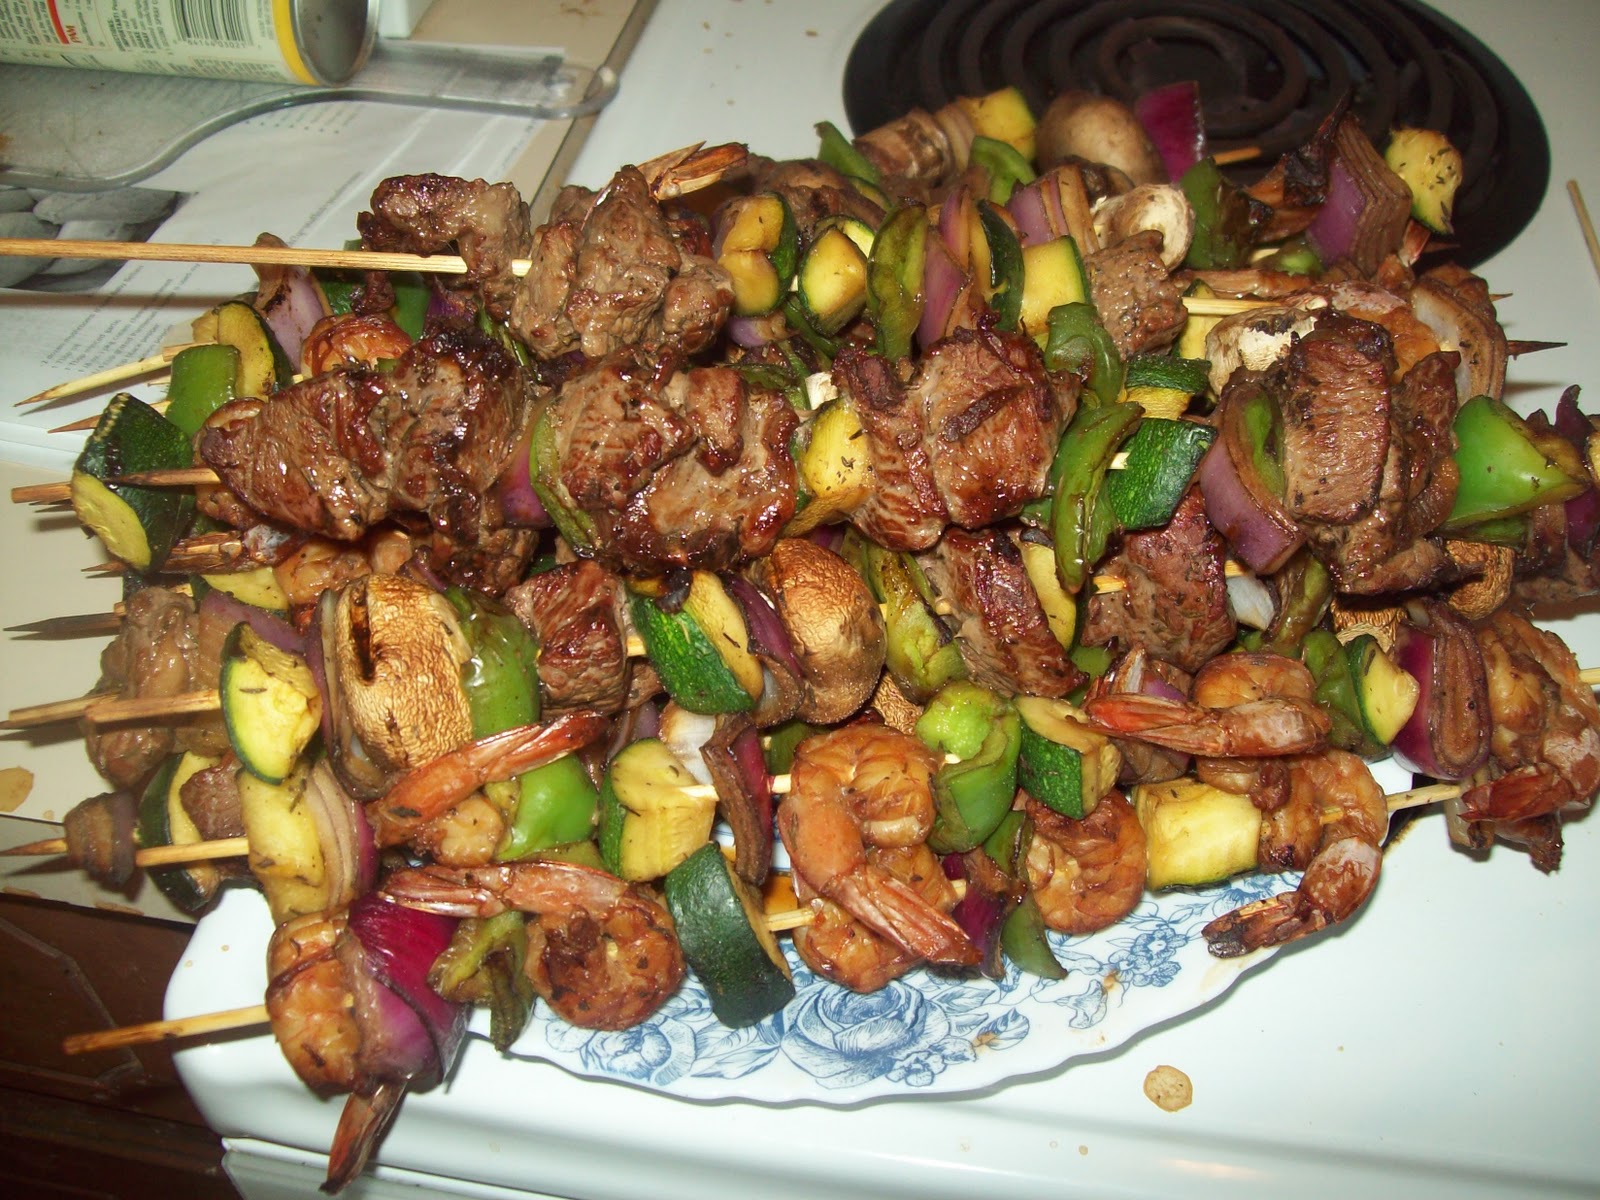
I cut all of my vegetables except, of course, the mushrooms into one inch cubes as best as I could. I marinated the meat in one bowl of marinade and the vegetables in another bowl of the same kind of marinade for a good two hours. Once the vegetables and meats were marinated enough, I just put them onto the bamboo skewers and threw them on the grill for about 5-6 minutes on each side.

The only thing that I urge is that you wait to cook the shrimp lastly because they cook very quickly and you don't want them tough and rubbery. The grill should be cooled down towards the end of cooking the steak kabobs and this is when the grill should be just perfect for cooking the shrimp.


 You see all these dang kabobs I made? I think there were about 25-30. There were only 4 1/2 people eating off of them and I only had two left the next morning. I was pretty proud. We'll definitely be making these agin!

Lumpia (Filipino egg rolls)

Saturday, October 9, 2010

Drum roll, please...

You guys kept asking for it, and here you have it! This is one of the most famous Filipino dishes amongst Americans, next to Adobo. I have had so many people ask me for this recipe, but up until a couple of weeks ago, I'd never attempted it on my own. My mother and I used to roll the egg rolls together and I always use to enjoy fixing this with her. I remember her using the recipe as a way to make a little extra money because everyone absolutely loved her egg rolls.

A couple of weeks ago, I went on a big Filipino cooking kick (for lack of a better word) and I tried everything from lumpia to mungo beans to pancit. I loved the way every single one of the recipes turned out but since this is such a popular one, I figured I would share this now.

This recipe means  a lot to me because, like I said, my mother use to make it with me and it was kind of our bonding time, so it was very hard for me to decide whether or not I would share this. Even now, I'm having second thoughts. :) After doing a little research, I got an idea of exactly how my mom did hers. It brought tears to my eyes when I tasted it and it tasted just like hers. Proud is an understatement!

INGREDIENTS:

1 LB Ground beef

2 Cups cabbage, thinly sliced

1 cup shredded carrots, shredded

1/2 onion, chopped

2 garlic cloves, crushed

3-4 tbsp soy sauce

salt and pepper to taste

1 package lumpia wrappers

Vegetable oil


PREPARATION:

If your lumpia wrappers (which, by the way, you can find at the Oriental Market or any Asian market) are frozen, you want to let them thaw out for at least two hours. While I was letting mine thaw out, I went to the grocery store to kill time and clean up. Just so you know, I was pretty excited about making lumpia again! :)

After getting everything chopped, sliced, and ready to go, go ahead and start cooking your ground beef. You're going to need a pretty large frying pan or wok to get all of the ingredients in there, so be prepared!


When the ground beef is no longer pink, drain off most of the grease and throw in the rest of the vegetables, soy sauce, and salt and pepper. Let the vegetables cook for about 5-8 minutes over medium heat. You don't want the cabbage and carrots soft because (as stated several times before) I like the vegetables with a crunch. You definitely want these vegetables to be a little raw because when you begin to fry the egg rolls, the vegetables with cook a little more.


Now for the hard part: pulling the egg roll wrappers apart one by one. Believe me, it's a pain in the rear! Just make sure that when you are pulling the wrappers apart, start from one corner or edge, and slowly, and I do mean very slowly pull the wrapper back. If you do it too fast, you're going to rip it!


After all of the wrappers are pulled apart, you're going to start filling them. I usually put about three small spoonfuls in the middle of the wrapper.


Next you're going to fold the wrapper up and over the filling. You're going to want to use very gentle movements with your fingers so that you don't tear the wrapper, which is very easy to do!


Now you're going to gently fold the right side (or left, whichever you feel more comfortable with) over and you'll do the other side exactly the same.


Once your wrapper looks somewhat like an envelope, you're going to want to secure your egg roll. When I secure my egg rolls, I use a small bowl (about 1/4 of a cup) of vegetable oil, get my fingers wet with the oil, and wet the edge of the egg roll wrapper with it. The oil is used as an adhesive to keep the wrapper together. Once this is wet enough, I roll my egg roll up and lay it edge-down in my casserole dish so that the weight of the egg roll will keep it from coming open.


This recipe should make right at about 25 egg rolls.

After I'm done making all of my egg rolls, I like to freeze mine overnight. You don't have to do this, but I do it because I know that the wrappers will be completely secured and they're much less likely to bust open while frying.


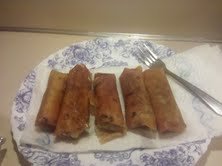
When I'm ready to fry my lumpia, I usually put about a cup or so of vegetable oil in a frying pan and fry them like that. There are several ways that you can fry an egg roll, but this is the way I prefer to do it. I usually let them fry on each side for about one minutes turning them 3 or 4 times until each side of the egg roll is golden brown. Be careful and make sure you watch them closely because they burn quickly! Not that I would know, of course! ;)


This last picture is the sauce that I like to use with my egg rolls. It's actually a Thai sauce! My family introduced this to me a few weeks ago when I went to their house for dinner. It's delicious! I have an egg roll sauce recipe that my mother used to make me make for our guests when they would come over, but I haven't made it in years so I am going to hold off on tell you guys how to make it right now.


I really hope you all enjoy recipe as much as we do. Even my fiance (who, by the way, is one of the pickiest eaters I have ever met) told me it's the second best egg roll he's ever had, so I was definitely happy with the results!

*Note: I don't mind anyone messaging me and commenting on my Facebook statuses about the recipes, but my blog doesn't look like it's getting any love. Only I can see the awesome amount of traffic it's getting when I look at my stats, so please comment here too! It'd make me super happy! Thanks! :) :) :)*

Sinigang (Filipino hot and sour soup)

Thursday, September 30, 2010

Love hot and sour soup from those Chinese restaurants? Well baby dolls, you'll LOVE this!!! I have been eating this soup since I was a small child and  my mother always used to cook it for me. I love it! It is by far my favorite Filipino dish. Laugh if you'd like, but I think I liked it so much because when I was a kid, my mom would use a leafy vegetable called kangkong (swamp spinach) and I could slurp the soup out of the stems. Don't judge me. I was a strange kid! ;)

So anyway, I was sitting around the house earlier procrastinating on going to the store when I remembered that I had pork in the fridge and the tamrind soup base in the pantry. HECK YES! That called for sinigang and sinigang is what I made!

INGREDIENTS:

1    Pk of pork (Can be boneless or w/ bone. My mom always used bone-- I don't. You can also use shrimp, chicken, or a combination of all in this recipe as well!)
1    Bundle of leafy vegetables (Its what I use... If you don't have access to an Asian  Market, you can use regular cabbage and it's just as good!)
1    Packet of Tamrind soup base. I think it's only sold in Asian markets.
10 Cups Water
The rest of the things I put in this recipe are optional. (Like I said before, I like to put my on twist on recipes, and besides, I put this recipe together by myself.)

I also used 8-10 cherry tomatoes, salt and pepper to taste, Frank's Hot Sauce (Good stuff!), a small slice of fresh ginger, about 2 cups of bean sprouts, and 1 small onion. This recipe can be changed just about any way you want. I have seen potatoes, carrots, and cabbage put into it as well. What makes this soup so good is the base.

PREPARATION:

If you're using the leafy vegetables in this recipe, just cut them into 1 inch thick strips. If you're using cabbage, I usually cut mine into about 3 inch thick chunks all the way around.It'll break apart once it's softened up.

I usually just go ahead pour the sinigang (tamarind) soup base into the 10 cups of water and once it is boiling, I put in my 1 inch thick, chopped pork. I make sure the pork is cooked, which I usually let boil for about 20 minutes. Once that is all done, I throw in the leafy vegetables or cabbage, whichever you prefer, the cherry tomatoes that I cut in half, and all of the rest of the vegetables.

Now here is what I have learned from experience. Depending on the flavors that your taste buds can tolerate, you may have to add more water OR (as my mother would tell me) you could cut down and use only about 3/4 of the tamarind packet. The base can be a bit strong, but I like it like that so I use the whole pack and don't use as much water. This is where I also add my salt, black pepper, and hot sauce. Just keep taste testing it to your liking. If you think the soup is even almost where you want it, you'd better stop adding because once the food starts settling and the flavors start coming together, the flavors are going to be a lot stronger.

After adding all of my desired vegetables, I let them boil for about 10-15 more minutes, depending how soft you want your vegetables. When I cook this recipe with cabbage especially, I don't like my evegetables too soft. I like my food with a slight crunch. Mushy food is not my style!


Now the soup should be done. I serve this soup over a small bed of rice, and.... VOILA!!! Dinner is served!

*Side Note: If you are in and around the Montgomery area and would like to try any of the Asian recipes that I post, there is an excellent little Asian food market in Montgomery. It is located at the corner of Federal Drive and Madison Ave which is in the shopping center directly across the street from Captial Heights Jr High School. The lady's name is Brenda and she is so helpful. I have known her since I was a kid. She'd be happy to help you in anything that you're looking for!*

About Me

My photo
I am a mother, soon to be wife, and daughter. I'm half Filipino and half American and was raised in sweet home Alabama. I have a passion for cooking food and I'm here to blog about it!
Powered by Blogger.

FilipinaFoodista Copyright © 2009 Designed by Ipietoon Blogger Template for Bie Blogger Template Vector by DaPino